


Main . Blog
7/23/2009: A shader-driven rendering pipeline
Today's entry's focus will once again be on the rendering pipeline, following my short introduction to its basic functionality about a year ago.
As already stated in the title, the beezEngine rendering pipeline is fully shader-driven, allowing programmers to change the way the scene is rendered and processed simply by changing shader code. This enables programmers to introduce a great variety of entirely new shaders to the engine without any need for custom application-side integrational code.
Communication between engine and shaders is handled by the so-called effect binders. The engine offers a whole bunch of these classes, providing the data necessary to transform and render objects as well as to perform lighting, shadowing and processing. In addition, these effect binders handle the creation of temporary, permanent and persistent render targets, automatically setting, swapping and scaling them at the request of the given shader. Effect binders even allow for dynamic flow control when it comes to rendering multiple passes, repeating or skipping passes according to the context in which the shader is used.
This all sounds extremely general, so here you go with some example code:
// Enables additive BlendingThis snippet is taken from the engine's default phong shader which makes use of quite a lot of the features described in the text above: The first pass is only used as a state block, the annotation bSkip telling the effect binder being responsible for dynamic flow control to skip this pass during normal rendering. The second pass is one of the passes that actually perform lighting, each of these passes providing one permutation for all of the different (pre-sorted) possible light type combinations. The Type annotation specifies that this pass is to be applied during the main (shading) stage of the current frame, there are also a pre (depth and additional data) stage as well as several processing stages. The LightTypes annotation specifies order and type of the lights that may be applied to this pass, bRepeat stating that the pass may be repeated several times if there are more lights to follow fitting this permutation. Finally, the PostPassState annotation specifies the name of the state-block pass defined earlier, thus once a lighting pass has successfully been applied, render states are changed to enable additive blending of the passes to follow.
pass AdditiveBlending < bool bSkip = true; >
{
AlphaBlendEnable = true;
BlendOp = ADD;
SrcBlend = ONE;
DestBlend = ONE;
}// Light pass
pass LightDP < string Type = "Main"; string LightTypes = "Directional,Point";
bool bRepeat = true; string PostPassState = "AdditiveBlending"; >
{
VertexShader = compile vs_2_0 RenderPhongVS();
PixelShader = compile ps_2_0 RenderPhongPS(GetLightingPermutation(LIGHT_DIRECTIONAL, LIGHT_POINT));
}
Here's another extract taken from the tonemapping effect:
// Average luminanceThis snippet shows off some of the post-processing features provided by the effect binders. The first pass specifies a custom temporary texture to render the average logarithmic luminance to, at the same time requesting the engine to scale the render target down by 1/4. The second pass further averages the logarithmic luminance rendered by the previous pass, repeating the down-scaling in steps of 1/4 until a x resolution of 4 is reached. Note that as this is a processing effect, render targets are automatically swapped unless explicitly specified otherwise. The third pass performs one more step of averaging, outputting the exponential value of the result into a different custom persistent render target of the resolution 1x1 (persistent, as the result needs to be blended with the luminance value of the previous frame to simulate eye adaption). Of course, the 0 in the Destination0 implies that it is possible to make use of multiple render targets at once.
pass LogLuminance < string Destination0 = "LuminanceTexture";
float ScaleX = 0.25f; float ScaleY = 0.25f; >
{
VertexShader = compile vs_3_0 Prototype::RenderScreenVS();
PixelShader = compile ps_3_0 RenderDownscaledLogLuminancePS(g_screenSampler, g_fScreenResolution);
}
pass AvgLuminance < string Destination0 = "LuminanceTexture";
float ScaleX = 0.25f; float ScaleY = 0.25f;
int ResolutionX = 4;
bool bRepeat = true; >
{
VertexShader = compile vs_2_0 Prototype::RenderScreenVS();
PixelShader = compile ps_2_0 RenderDownscaledLuminancePS(g_luminanceSampler, g_fLuminanceResolution);
}
pass ExpLuminance < string Destination0 = "AdaptedLuminanceTexture"; int ResolutionX = 1; int ResolutionY = 1; >
{
VertexShader = compile vs_2_0 Prototype::RenderScreenVS();
PixelShader = compile ps_2_0 RenderDownscaledLuminancePS(g_luminanceSampler, g_fLuminanceResolution, true);
}
The creation of new render targets to perform averaging, blurring and similar stuff on, is easy as pie:
// Luminance textureIn that way, the whole rendering pipeline may be customized simply by changing shader code:
Texture g_luminanceTexture : LuminanceTexture <
string Type = "Temporary";
string Format = "R32F";
>;
// Adapted luminance texture
Texture g_adaptedLuminanceTexture : AdaptedLuminanceTexture <
string Type = "Persistent";
string Format = "R32F";
>;
// Depth textureThe DefaultIn and FinalIn annotations also explain why it is not always necessary to specify custom render targets: DefaultIn specifies the stages that the render target is to be used in whenever there is no explicit destination given. FinalIn specifies the stages during which the render target is to be promoted onto the screen or onto different objects (e.g. when rendering reflections), given that one of the stages specified is the last to be rendered.
Texture g_sceneDepthTexture : SceneDepthTexture <
string Type = "Permanent";
string Format = "R32F";
string DefaultIn = "Pre";
string FinalIn = "Pre";
bool bClear = true;
bool bClearDepth = true;
float4 ClearColor = 2.0e16f;
>;// Scene texture
Texture g_sceneTexture : SceneTexture <
string Type = "Permanent";
string Format = "R16G16B16A16F"; // HDR
#ifndef SCREEN_PROCESSING
string DefaultIn = "Main,Processing";
string FinalIn = "Main,Processing";
#else
string DefaultIn = "Main";
string FinalIn = "Main";
#endif
string DefaultSlot = 0; // Allows for MRT
bool bClear = true;
float4 ClearColor = float4(0.0f, 0.0f, 0.0f, 1.0f);
>;
One more important feature concerning the shader-drivenness is the possibility to define render queues inside the shader framework:
// Solid renderablesRender queues specify a layer number that influences the order in which the queues are rendered (similar to the css layer attribute, haha), as well as certain flags, such as switching off specific stages for a particular queue, or enabling depth sort for alpha-transparent objects. A shader may then specify a render queue inside its technique annotations:
RenderQueue g_solidRenderQueue : SolidRenderQueue <
unsigned int Layer = 0;
bool bDefault = true;
>;// Canvas renderables
RenderQueue g_canvasRenderQueue : CanvasRenderQueue <
unsigned int Layer = 1;
bool bPrePass = false;
bool bDepthSort = true;
>;// Alpha renderables
RenderQueue g_alphaRenderQueue : AlphaRenderQueue <
unsigned int Layer = 2;
bool bPrePass = false;
bool bDepthSort = true;
>;
technique SM_2_0 < string RenderQueue = "AlphaRenderQueue"; >
7/17/2009: Shadows, HDRR, More Footage
And another four months! Incredibly huge amounts of things have happened since my last update in february, and that is besides me finally having finished school. Lots of new features have arrived throughout the last months, including soft shadows, high dynamic range lighting, support for multi-sampled anti-aliasing (tough one, still fighting a few of the typical issues here) and a completely new shader library. In addition, lots of bug fixing, refactoring and testing has been done, making the engine more usable than ever.
I won't go into the details today, instead I will just try to please you with another video showcasing the already well-known Amsterdam TechDemo in a completely new light:

Stay tuned, great things are about to happen in very near future. (And by the way, thanks for all the nice feedback!) Wonder what Devmania is? Check it out here. And sorry for the shaky free-hand cam...
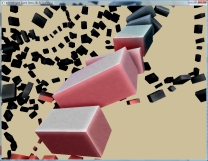
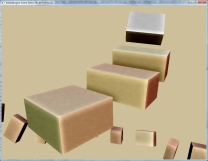
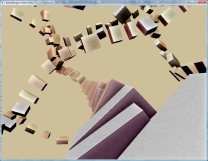
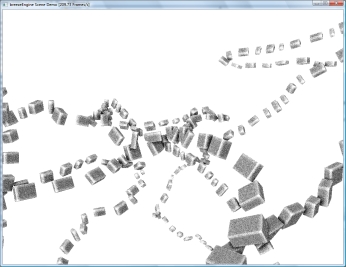
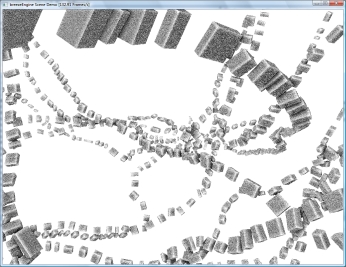
3/2/2009: New Footage
Wow, another four months without update. Here we go with some nice new and shiny images taken from my most recent testing application:


The demo was developed in exactly one week, inspired by my uncle's idea of putting up towers that are connected by ropes all over Amsterdam, transporting people anywhere solely by means of gravity, and thereby solving the city's traffic problems. Besides being a quite innovative concept, this idea proved to be a great opportunity to evaluate the engine's current capabilities and workflow. There's even a video online, showing some footage taken from this testing application:

10/30/2008: SSAO, shadows, refactoring
Another two months no update, high time to skim through the recent subversion commits (loads of commits) and cover some of the more interesting changes in this "blog":
Shortly after the previous entry, I finished my experimental implementation of Screen Space Ambient Occlusion. Blurring the occlusion buffer turned out to be quite harder than expected, as the random noise generated by the ambient occlusion algorithm turned into nasty cloggy artifacts the moment I tried applying some gaussian blur. After lots of experimenting, I ended up using a 12-sample poisson disc to blur the occlusion buffer, which resulted in an ok-ish image with some barely noticable smooth random patterns left. Finally, I combined the occlusion buffer with the original scene:
Besides doing lots of architectural reorganization and refactoring, I also started to implement shadow mapping. Up to now, directional light (sun) shadows are the only shadows available, as high-quality long-range shadows seemed the most demanding to me, clearing the way for other light types' shadows as well. The current implementation uses a technique known as PSSM (parallel-split shadow maps), orthographically rendering the scene to one of three different shadow splits, depending on the viewer's distance (visualized on the left screenshot). Filtering & softness still missing:

Yet, by far the largest number of commits throughout these last two months were dedicated to the API. These changes include both generalization (e.g. to make lights available in processing effects) and simplification (making overly nested methods more accessible). Lots of classes were renamed according to their final responsibilities, making the API much more understandable and intuitive. Although there are still some methods missing, the basic class hierarchy may now be considered close to final.
9/4/2008: Rendering pipeline #1
Today's entry will focus on the key features of the engine's now close-to-final rendering pipeline. Throughout the last months, the rendering pipeline has grown a lot - in fact, it has by far outgrown my original plans.
My original intention was to implement a simple class taking over the management of scene elements that would frequently be required throughout the whole rendering process of a scene. This concept included collections of lights, renderables and perspectives, a central interface providing all the information needed to render a typical 3D object. The concept worked out pretty well. Soon, I had my first lit objects on screen, which can still be seen on the breezEngine project page.
Following this rather basic functionality, I started implementing a post-processing framework. This processing pipeline basically consisted of a list of processing effects being applied to the fully drawn scene, one after the other. The processing pipeline also provided depth, scene and screen targets any effect could write to and read from. In addition, it implemented the swapping mechanism necessary to allow for chaining of several effects. Of course, I also ran into the mysterious pixel shifting issues that almost certainly occur whenever people start implementing post-processing for the first time. Fortunately, there is this great article by Simon Brown on the net, explaining all about these issues.
Next thing, I introduced intermediate render targets into the processing pipeline, enabling shaders to define additional textures of arbitrary dimensions to write their temporary output to, allowing for blurring and downsampling without any need for additional engine code. The result of these efforts can also be seen on the breezeEngine project page as well as in the second entry below this one.
Afterwards, I realized that the concept of intermediate texture targets had even more potential than the actual implementation made use of. The basic idea was to generalize the possibility of defining additional render targets for all effects, moreover introducing the possibility to share these intermediate target textures among all effects. This led to the distinction between "temporary" and "permanent" render targets, the former only existing throughout the execution of the corresponding shader code, the latter existing throughout the rendering process of the whole scene. With this functionality implemented, it is not only possible to add pre-processing effects preparing scene-wide textures such as ambient occlusion, but it is also possible to change the whole process of rendering. For example, by introducing additional render targets, it is now possible to also render positions, normals and material IDs, allowing for the implementation of deferred shading only by changing shader code. In the end, I even removed all of the predefined render targets except for the depth buffers (and the back buffer, naturally), which led to a pretty neat design.
Lastly, the obligatory screen shots of my first attempt implementing Screen Space Ambient Occlusion:
I might also cover some of the theory behind this technique in another entry.
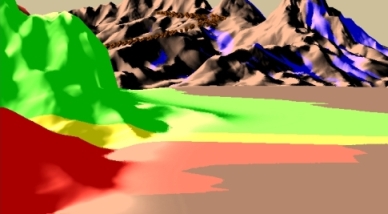
8/31/2008: Subversion & Landscape
Looks like the 'blog-style' thing did not work out, at least not for the past few weeks. Anyways, I've been busy with a lot of things, some of which I am going to report in this entry.
First thing, I reinstalled subversion as I was once again fed up with all those hacky *.*_ and *.*__ backup file names. (Yes, I did work without any version control since I moved to Vista, due to laziness I guess, although it could have saved me some trouble). After some nasty fiddling around with apache and its modules, I finally got it working again and I'm really pleased with this new comfort.
Afterwards, having all the freedom of messing around with my code without breaking anything, I did some testing on the efficient rendering of landscape, which resulted in a first prototype of a hierarchical patch-based level of detail approach, theoretically allowing for infinite tesselation, as always strongly bonded by memory constraints. This approach basically works like a quadtree, splitting the landscape into four patches, again being split into four patches, and so on. Every patch uses the same vertex and index data, allowing for extremely memory efficient rendering. The height data is read from texture, which sadly limits this approach to Shader Model 3.0 hardware. I did some testing on reading the height data from texture on-the-fly, interleaving it into the vertex data using vertex streams on Shader Model 2.0 hardware. Updating heights only when necessesary, this did indeed work out. Yet, naturally, it greatly increased the number of vertex buffers, requiring a lot more VRAM. I ended up using a pool of vertex buffers shared among all patches, acquired and released according to the patches' current level of detail and visiblity.
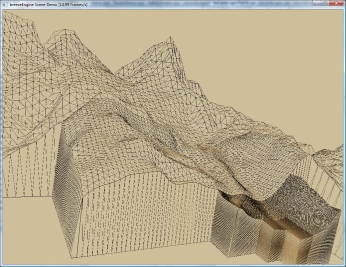
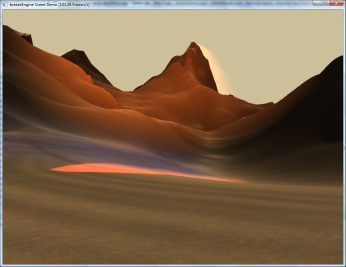
Some early stage of my landscape implementation can also be seen on the last screen shot featuring god rays on the breezeEngine project page. More images to follow soon, including my early experiences with Screen Space Ambient Occlusion.
Besides, I am still working on the rendering pipeline, currently introducing simulation-wide scene management, perspectives and lots of other stuff. The post-processing framework is more or less complete, there has been a lot of reworking since the last entry, opening up lots of new possibilities such as mixing of forward and deferred rendering, pre-processing, shader-controlled temporary and permanent render targets etc., which I am also going to describe in one of the next entries.
6/1/2008: Post-processing framework
As I'm currently implementing the engine's post-processing framework, I just uploaded a bunch of new images today. The images show various post-processing effects applied to my test scene, among them depth of field, glow/bloom and edge detect:


Hope you like 'em. The framework's still WIP, yet I think it's already working out quite fine.
5/22/2008: A property-driven Entity System
No new images today as I just finished the integration of a new template-based resource manager into the engine to reduce redundancy. Instead, I am going to outline the main aspects of the engine's entity system in this entry, which might be interesting for the ones among you working on similar projects.
The lack of a solid entity system last time was one of the major points leading to the decision to rewrite the whole engine from scratch. Therefore, the entity system had to meet several requirements this time: It had to be easily extensible, offering base classes (CEntity being the very base who would have guessed...) to carry out all the boring work, it had to be hierarchical (node-based), allowing for grouping as well as the composition of assets (more on that later) and it had to provide an interface for the generic treatment of properties.
Most of these key features is implemented by now, and they are already paying off. Each entity offers a specific set of properties, which may be enumerated and modified through the CPropertyDriven base class at any time, for example allowing applications to expose the availabe properties to designers, who may then tweak the entities' appearance and behavior through a comfortable user interface, instead of fiddling around with code. The property system fully supports the hierarchical composition of entity classes, meaning that there is no need for any class to redefine any properties of the entity types it is derived from. The property system also simplifies the process of saving and loading as it allows for most of the data to be serialized and deserialize in an entirely generic way.
Moreover, the entity system offers a property listener interface, enabling external objects to react to the property changes of specific entities. Thus, modules such as the scene management module are able to keep themselves up-to-date without any need for explicitly invoked update routines. All in all, I am very pleased with the whole system, time will show whether it suits the project's needs.
5/16/2008: Mandelbrot
After playing around a bit with a Mandelbrot demo I wrote some time ago, I decided to upload some screen shots, as the images produced do indeed look quite beautiful:


The trick was to tweak the colors in a way that shows more detail than just linearly interpolating from 0 to max iterations. Instead, I use a sine curve to get several color cycles, 4 for the range from 0 to max iterations in the screen shots above. In addition, each color component uses a different sine offset to obtain a colorful rendering rather than a greyscale image.
5/14/2008: Gates reopened
I'm not sure about when this site was last updated. I'm not even sure about when this site last contained anything useful at all. Anyway, once again, this site is opening its gates - to show off some of my projects - and hopefully to inspire and help others.
A few decisions were made to keep this site more up-to-date this time. As you may have noticed, this site is no longer available in German. Having to translate stuff all the time definitely is one of the most annoying obstacles when your actual intention is to convey contents, not language.
Besides, a pretty website showing lots of nice and shiny images is a great thing, however, such images tend to pop up at large and very irregular intervals. Therefore, I plan to focus much more on technical aspects this time, to make this page not only nice to look at, but also interesting to read. I will try to update this page in a blog-style way to give insight into the development process itself, including design decisions, technical findings and troubles I come across.
In addition, this site now offers the opportunity to leave your comments and thoughts on anything you might come across when browsing this website. Feel free to comment or ask questions whenever you like.